My 9-year old daughter, Haylee, and I had the chance to check out the Learn to Make Doll Clothes Video Course with 8 Free Doll Clothes Patterns by Rosie’s Doll Clothes Patterns.
WHAT IS IT?:
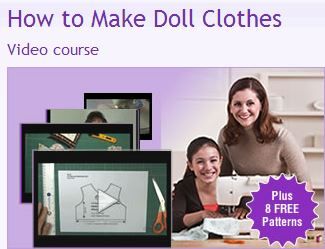
The Learn to Make Doll Clothes Video Course with 8 Free Doll Clothes Patterns gives you one year of access to a complete video sewing course with tips and tricks for making doll clothes. The video course includes access to over 130 instructional videos (approximately 8 hours’ worth) that take you through the basics of sewing, tools of the trade, and tips and tricks for sewing doll clothes.
The 8 free patterns include step-by-step video instructions showing you how to sew each article of doll clothing, along with printable patterns and printable instructions. You’ll have access to the videos for 1 year, but all patterns and sewing instructions for the patterns are downloadable to your computer so you can keep them forever and print them as needed.
 This online instructional course with free patterns is available for just $48.00, and it’s suitable for even the most basic beginner. You can also request immediately after your purchase to receive the patterns for the 18.5” Cabbage Patch Doll instead for the same low price. You also have the option of completing your video course over a period of 6 weeks, or get access all at once and go at your own pace with continued access for a year. If you prefer to keep the video course forever, you can purchase it on DVD for $67.23. This course is recommended for anyone age 8 and up.
OUR EXPERIENCE:
Haylee has absolutely no sewing experience. It’s something I’ve wanted to teach her but just couldn’t find the time and opportunity to do before. So when this review came up, we were both very excited at having an organized, step-by-step way to introduce her to sewing. And what better way to do it then with fun doll clothes patterns!
Haylee decided she wasn’t yet ready to handle the machine, but she was eager to learn the basics of sewing. I was very impressed right from the start at how basic the instruction really is in the video course. If you knew absolutely nothing about sewing, you would be able to start this course and learn all you needed to know to get started.
I began by downloading and printing out all of the patterns and instructions for the 8 free doll clothes patterns. This took a little bit of tweaking, because when I took Rosie’s advice and double-checked the measurements on the printed patterns, I discovered they were smaller than they needed to be. I followed the video instructions regarding how to set up your printer, but it did not address the specific issue I turned out to have. After looking carefully at my printer’s settings, I realized it defaulted to “shrink to fit” rather than “actual size.” After unchecking that box, I reprinted all of the patterns and found that they were of accurate measurements this time.
Once I had all of my printed materials, I had a nice-sized stack of papers and wanted to organize them for future reference. After all, these patterns can be used again and again, particularly since you print them on standard paper, which is significantly thicker and sturdier than today’s flimsy tissue paper patterns that barely survive the first use. So I grabbed a pack of tabbed index


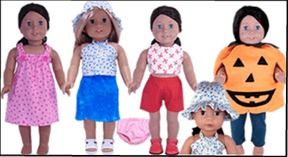
dividers and went to work labeling the tabs for each of the patterns. I 3-hole punched the pages and put everything into a 1/2” binder. I took the Rosie’s Doll Patterns logo and her image of what the 8 completed doll clothing items look like and used that to create a cover page to slip into the front cover of my binder. Then as I cut out the patterns to use them for the first time, I put the pattern pieces into a pocket on the back side of each divider, which I quickly made by cutting a sheet of paper in half, folding under the edges on 3 sides, and gluing this pocket onto the divider. Then all of my pattern pieces fit inside the pocket for future use.
Week 1 of this 6-week course covers topics such as setting up your sewing room, tools to make sewing doll clothes easier, all about fabric and elastic, how to use your sewing tools and cool tips for using them. Your free pattern for week 1 is for sports shorts. Haylee got to learn about the difference between a serger and a sewing machine, and she learned about some of the great sewing tools that would really come in handy for making doll clothes, such as the loop turner, bodkin, and sewing gauge.
Week 2 covers topics such as printing/preparing/cutting your pattern and fabric, cool tips for preparation/working with fabric or thread, and troubleshooting during preparation/cutting/working with fabric. Your free pattern for week 2 is for a crop top.

Week 3 covers topics such as how to sew straight and zigzag, cool tips for sewing straight lines, troubleshooting to save time, how to sew a hem, how to create more advanced hems, cool tips to make sewing doll clothes really easy. Your free pattern for week 3 is for a sarong, which comes in 2 variations for either short or long. We decided to make the short sarong to go with the halter top we were making for week 4. The complete outfit is shown here. It turned out so lovely! The sarong video gave some great tips for sewing the curves so they are smooth and even. You can see in the photo that there were no disruptions in the curved lines of the skirt. Rosie teaches a great way to ensure this, and I learned something myself with this project! I’ve used her technique when sewing curves together, but not when sewing a curved hem. That was really neat! This was also a quick project, though it required a bit more attention than the halter top below.

Week 5 covers topics such as threading elastic in a casing, using elastic to save time, cool tips 
Week 6 covers topics such as how to attach trimmings and fastenings, and cool tips when working with ribbon, buttons, or to make your doll clothes fit lots of dolls. Your free patterns for week 6 include ones for a hat, a pumpkin costume, and underwear.
I have to say that Haylee and I both thoroughly enjoyed this course! It was just downright fun! For Haylee, I think the pace of the instructional videos was just right. I’m a more seasoned seamstress, as I’ve been sewing for about 30 years. So for me, the pace was painfully slow, mainly because the majority of the information was not new to me. The sewing instructions for the patterns themselves were just fine…those videos were appropriately paced for beginners and more advanced sewers alike, in my opinion. So when I say it was too slow for me, I’m referring to the basic 6-week “how to sew” portion of the instruction. Then again, I don’t think I’m the target audience for that…it’s really aimed at someone with less experience.
You can order the patterns individually, which includes video sewing instructions for each one. That would probably be a more appropriate choice for me personally. But honestly, for all of the free patterns that are included with this video course, it’s probably a better value just to go for the whole course! And who knows, you may pick up some great tips that are specific to doll clothes along the way anyway! I did learn a few things myself!
For Haylee, this is a wonderful course that I know she’ll use again and again as she musters up enough courage to try out what she’s learned on the actual sewing machine. She has learned so much about sewing already from just watching the videos and from the great discussion prompted along the way as she watched me complete each step. This video course provides a great opportunity to pass on the art of sewing to your daughters (or sons) in a fun, easy-to-teach presentation.
In the past, I’ve usually purchased 18-inch doll clothes as a Christmas gift for my daughter, but with these patterns that are so quick and simple to use, I can make my own doll clothes in a short amount of time. We both loved the fun of selecting the fabrics to go together and the idea of adding our own special touches to get the doll clothes we really want. I can’t imagine ever buying pre-made doll clothes again! I’d rather give her a more personalized gift anyway, and this product allows me to do that!
Check out what other Crew members had to say about the Learn to Make Doll Clothes Video Course with 8 Free Doll Clothes Patterns by clicking the banner below.

No comments:
Post a Comment